A Comprehensive Guide on How to Use a Floor Scraper to Remove Residue
Whether you're preparing a surface for a new floor installation or rejuvenating an existing one, a floor scraper is an invaluable tool for removing stubborn residues and adhesives. In this comprehensive guide, we'll explore the step-by-step process of using a floor scraper effectively to restore the beauty of your floors by eliminating residues and preparing them for the next phase.
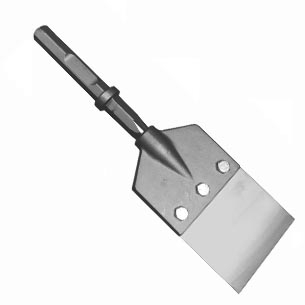
Types of Floor Scrapers
Manual Floor Scraper: Operated by hand and suitable for smaller areas.
Power Floor Scraper: Powered by electricity or gas, designed for larger projects and heavy-duty applications.
Blade Types: Straight Blades: Ideal for general adhesive and residue removal.
Step-by-Step Guide on How to Use a Floor Scraper
Step 1: Prepare the Work Area
Clear the space of any furniture or obstacles that might impede the scraping process.
Ventilate the area to ensure proper air circulation, especially if using chemical solvents.
Step 2: Wear Personal Protective Equipment (PPE)
Put on safety goggles, a dust mask, gloves, and knee pads for protection during the scraping process.
Step 3: Choose the Right Blade
Select the appropriate blade based on the type and thickness of the residue. Some blades are effective for thicker adhesives, while straight blades are suitable for general residue removal.
Step 4: Secure the Blade
Ensure the blade is securely attached to the floor scraper, following the manufacturer's instructions.
Step 5: Test in a Small Area
Before tackling the entire floor, test the floor scraper in a small, inconspicuous area to gauge its effectiveness and adjust the blade angle if necessary.
Step 6: Start Scraping
Hold the floor scraper at a slight angle to the floor, ensuring the blade makes contact with the residue.
Apply even pressure as you push the scraper forward, allowing the blade to lift and loosen the residue.
Step 7: Adjust Blade Angle as Needed
Depending on the type and thickness of the residue, you may need to adjust the angle of the blade for optimal scraping.
Step 8: Repeat the Process
Work systematically across the entire floor, repeating the scraping process until all residues are removed.
Step 9: Clean Up Residue
Regularly clean the residue from the blade to maintain its effectiveness.
Use a dustpan and brush or a vacuum to collect the loosened residue.
Step 10: Final Clean-Up
After completing the scraping process, thoroughly clean the floor with a suitable cleaner to remove any remaining traces of residue.
Tips for Effective Floor Scraping
Use Solvents Wisely
If needed, apply a suitable solvent to further loosen stubborn residues. Follow the manufacturer's recommendations and ensure proper ventilation.
Work in Sections
Divide the floor into manageable sections and focus on one area at a time to maintain control and efficiency.
Inspect the Blade Regularly
Periodically check the blade for signs of wear or damage. Replace the blade as needed to ensure optimal performance.
Follow Safety Guidelines
Adhere to safety precautions and guidelines outlined by the floor scraper manufacturer and the solvent, if used.
Conclusion
Using a floor scraper to remove residue is a transformative process that can breathe new life into your floors. By following this comprehensive guide and considering the type of floor scraper, blade, and safety precautions, you can tackle residue removal with confidence and achieve a clean, pristine surface. Whether you're preparing for a new floor installation or revitalizing an existing one, the proper use of a floor scraper is a key step in the journey toward a refreshed and polished floor space.
Learn How to Remove Flooring using an Electric Floor Scraper